There is no doubt that the back part of the vest holds the absolute essence of riding culture. It is a place for others following you in the formation to see. It represents who you are and where your loyalty lies.
Proper motorcycle patch placement for independent riders, social clubs, and more traditional organisations involves having knowledge about hierarchy in design structures. It is important to remember that the backside cannot be cluttered.
It should have designs that are easy to recognise from a distance and are legible during movement at highway speeds under rain conditions. Traditional clubs follow a very structured design structure that would be better explained through a comprehensive motorcycle club patch placement guide.
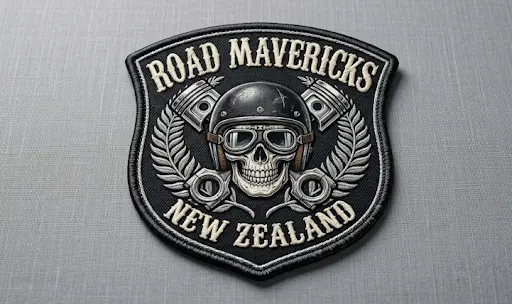
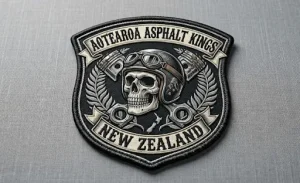
In particular, the three-part patch setup includes a curved banner at the top showing the name of the organisation, a custom logo at the center, and a curved banner showing the location at the bottom of the design.
These three elements must be positioned in a manner that ensures they are centrally aligned with the space between them being mathematically precise by two or three centimeters apart.
Motorcycle Patch Placement on Biker Vest
For any true biker from the windblown shorelines of southern South Island all the way to the sun-baked roads of northern New Zealand, a leather or thick denim vest serves not as a protection from the elements but rather as an expression of their identity and journey.
Each piece of embroidery that finds its place on the vest means something specific: miles run, brothers found, and alliances formed. Yet, merely obtaining these motorcycle patches does not make for an end in itself.
Proper understanding of the right ways to arrange the patches will help show your appreciation to the tight community and express your personal message at the same time.
Sitting down with the needle and thread or handing over the vest to a professional machinist becomes an act that transcends time. There is a specific set of unspoken guidelines when it comes to patch placement that combines personal taste and tradition.
Failing to do it right might get you strange looks at the local petrol station but could also bring about misunderstandings from the whole community. This guide goes into great depth regarding key protocol, traditions, and technical aspects needed to create a perfect patch placement.
Foundations of Motorcycle Patch Placement Layout
Before starting to pin the patch on your leather vest, you will need to take into account multiple zones. These include the highly sacred and regulated area of the back, which features your primary affiliations, the fronts, which serve for personal markers, and the sides, which manage additional milestones.
You will have to make sure to balance your vest properly, for if you put too much emphasis on certain areas without adding any on others, you will destroy its visual consistency. It is better to create such a layout of markers that will direct attention from the most important affiliations to your smaller achievements.
Materials also matter greatly when working on your vest, as they determine the tools required for sewing and the proper spacing of designs. For example, cowhide leather cannot be fixed if it gets a puncture hole, hence the necessity to use proper materials.
Thus, planning becomes very important, as any wrong moves will damage your vest beyond repair. To make sure this will not happen, lay the entire piece of leather on a large table and draw a sketch of your intended layout with either double-sided tape or chalk.
Motorcycle Patch Placement Strict Guidelines
Being a part of an official club means being in an atmosphere where everything is defined by traditions. The MC patch placement rules are extremely detailed and strict in all parts of the world, including New Zealand.
The traditional layout belongs to those who have been chosen due to time and effort put into earning it. An independent rider or simply a social organisation should not copy a three-part patch layout or use particular combinations of territories and banners because such a layout implies the existence of a fully chartered club.
When arranging these elements, the top banner follows the curve across the shoulder blades in accordance with the vest seams. The center part is placed right in the middle of the back surface and works as a key element of the whole vest patch system. The lower banner is curved along the waistline.
In case the club uses the ID cube patch, it is put on the right side of the central part. When it comes to other than traditional riding groups and family clubs, one should place a one-piece badge on the back surface or use a non-linked top banner.
Motorcycle Patch Placement Front Panel Protocols
Although the back of the vest symbolises the affiliation of the group, the front of the vest is purely dedicated to you, your rank, and your accomplishments. The placement on the front of the vest usually has two chests, each bearing unique kinds of patches.
According to tradition, your name, road name, or nickname must be placed on the left chest patch over your heart, which is basically the center of the individual personality.
In case you have an official position or title in a certain ride club, e.g., president, road captain, or secretary, then the title must be placed just over or under your name patch.
Event patches, anniversary patches, memorial patches, and brand patches are usually placed on the right chest patch.
This helps to keep the vest looking organised. While putting your patches on the front of the vest, it is recommended to make sure the tops of the patches are placed horizontally on both chests to provide even symmetry.
Additionally, it is necessary to make sure nothing will obstruct the pockets on the front and prevent access to the zipper or snaps because otherwise, opening and closing the vest will become extremely difficult when riding.
Placement of Motorcycle Patch for Brand and Associations
However, for those members who are part of global riding groups sponsored by factories, things take a different turn. The example in this case could include the official Harley Owners Group patches placement manual, which calls for members to have a very organised, neat look in terms of design.
Such systems include a large main patch at the back, which is accompanied by a top rocker that indicates the particular local chapter the member belongs to, for example, Auckland, Wellington, and Christchurch. This represents an organised global community and thus must be worn proudly.
When designing the front of your association vest, it would mean having a display of your progress in the club over several years and events. The local chapter patch is usually put on the left breast pocket, while your official milestones are arranged vertically on the right side of the vest.
This system will give you an opportunity to keep adding yearly renewals below your main patches. Arranging your patches in straight columns on the front of your vest will help in avoiding a cluttered appearance.
Utilising Side Spaces and Lateral Enhancements in Motorcycle Patches
As time progresses and your miles add up, it will not be long before your front and rear panels reach maximum capacity. This is where side rocker patch placement becomes an excellent option for expanding your collection without crowding your main layout.
With side panels located below the armpits at the lateral seams of your vest, they serve as unique vertical spaces that are perfect for lengthy banner pieces or stackable patches for commemorations.
In addition, placement of side elements requires that pieces be aligned vertically to match the shape of the leather itself, starting from the armpit and extending down to the waistline. They can represent long rides, such as ultra-marathons or particular rally events such as the Burt Munro Challenge, as well as personal mottoes.
It is also best practice to balance the pieces between the two sides, especially in terms of vertical patches. Three pieces on one side need to be balanced out on the other side eventually. This ensures that the vest does not twist when worn during your motorcycle rides.
The History and Meaning of Numerical Symbols on Motorcycle Club Patches
In the rich history and trends of custom patches, motorcycle patches hold a major percentage. The biker culture is filled with codes, abbreviations, and number symbols that bear historical significance.
Among the many symbolic elements associated with bikers, one of the most popular is the 13 1/2 patch. This particular symbol has its own unique history related to the old-school custom culture.
The meaning is simple: 12 jurors, one judge, and half a chance. Therefore, it reflects an unmistakable anti-establishment ideology and an homage to the history of the legal system.
This patch represents the attitude of people for whom ultimate freedom is the highest priority and who live according to their own laws on the road. Since such patches are associated with personal significance but not with organisational ranking, they cannot occupy the best places on the leather vest.
They can almost never be positioned in places such as the middle of the back panel or the top left part of the vest. The right way to wear them would be to use front parts of the vest, such as side seams or even the internal pocket of the lapel.
How to Secure Motorcycle Patches Permanently
However, once all this work has been done, there still remains the problem of how to fix the design on to the vest permanently. While it is true that an iron-on patch backing will allow for a certain temporary fastening of the fabric, eventually the elements will destroy this weak hold.
When attaching leather to a vest, you must not apply heat under any circumstances, since the excessive heat will spoil the natural oils of the material and cause it to shrink, bend, and finally become unusable. The only right way out is by machine or hand stitching.
Before starting sewing patches, be sure to get a strong, non-decomposing nylon or polyester thread suitable for use in such harsh conditions as the New Zealand climate can be expected to offer. You will need to use a special needle to penetrate leather without tearing it apart.
It is absolutely necessary to unsew the lining to allow for attaching the embroidery only to the outside layer of leather. This will make the pockets usable and prevent you from having the rough threads inside the vest that can tear your clothing. Using the right backing technique varies situation to situation and helps improve durability.
Navigating the Motorcycle Patches in New Zealand
There exists an established tradition within the motorbike riding culture of New Zealand built on mutual respect, common enthusiasm, and an adoration of the rich terrain that we ride through.
Regardless of whether you are riding through the tight turns of the Coromandel Loop or through the wide straight stretches of the Canterbury Plains, your vest is a vehicle for social interaction.
Properly choosing your vest markers while having the decency to consider the traditions of the region will guarantee that you are received warmly at all local rides, motorcycle conventions, and even at charity poker runs.
Having your vest designed by local experts with extensive knowledge of the culture and weather conditions present in New Zealand is a guaranteed road towards creating something special.
Using premium quality embroidery, clear merrowed edges, and solid backing materials will ensure that your vest lasts for many years ahead, surviving all the rough treatment. A combination of a well-thought-out layout and excellent manufacturing will help you create the vest of your dreams. One that will last you a lifetime.
Frequently Asked Questions
Can an independent rider wear a custom bottom rocker indicating their hometown or city?
Independent riders should avoid isolated bottom rockers with specific city names, as they represent claims by chartered clubs. Instead, they should display regional pride on front chest panels or as a single circular badge on the back.
What is the best way to handle layout placement if I belong to multiple riding groups or social associations?
Maintain separate vests for different organisations to avoid disorganisation and conflicts of interest. If using one vest, prioritise one group on the back and use a small front marker for the secondary group, with prior permission.
How should I clean or maintain my vest once all my custom markers have been sewn into place?
A detailed vest should not be machine washed or dry cleaned, as it may damage leather and embroidery. Instead, spot-clean fabric with a damp cloth and mild soap, and condition leather yearly to maintain its suppleness and water resistance.
Is it acceptable to place patches on the collar or the waistband of a standard vest layout?
The collar and waistband are ideal for small accents like pins or blood-type tags for emergencies. The waistband suits thin event bars or logos, but ensure they are securely stitched to prevent catching on straps.
Bring Your Motorcycle Patches to Life with Patch Makers New Zealand
As you have just read in our article on motorcycle club patch placement guide, it should be clear by now that your biker vest speaks volumes about your ride through life, and this calls for perfection both visually and in terms of durability.
At Patch Makers New Zealand, we provide a unique opportunity for getting your hands on a high-quality custom piece designed to last under any kind of Kiwi weather or miles traveled across highways.
No matter whether you are looking for a clean front patch design that will include the name of your motorcycle club or other details, a commemorative side rocker, or an entire custom layout for your local biker brotherhood, Patch Makers New Zealand offers all-inclusive assistance. Contact us for a free consultation and quotation to start customising your biker jacket.